
Installation Instructions
Follow the steps for your product type and transform your space in minutes.
📋 Before you start
- If you need to wait before applying the sticker, store it flat in a dry place (not inside the box).
- Clean and thoroughly dry the surface before applying the sticker.
- If the wall has been freshly painted, wait at least 2 weeks.
- Our adhesives are inkjet-printed: do not scrub them directly.
- On walls with a light texture (fine-grain render), use a sponge instead of a squeegee.
How to apply your sticker step by step
Applying a decorative wall sticker is quick and easy. Follow these 4 steps.
1

Separate the piecesCarefully peel each sticker piece away from its backing paper.
2
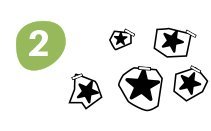
Test the layoutUse masking tape to position the pieces on the wall and preview the arrangement before sticking them down.
3

Apply the stickerRemove the backing paper and press the sticker firmly onto the wall, working outward from the centre with a squeegee.
4

All done!Run over the edges to ensure a good bond. Enjoy your decorated space!
🎉
All done!
Enjoy your newly decorated space.
📋 Before you start
- Thoroughly clean the riser of each step: it must be dry and dust-free.
- Works best on steps with a smooth surface.
- If the step is very wide, it is recommended to apply it with two people.
How to apply stickers to stairs
4 steps to decorate your stair risers easily and durably.
1
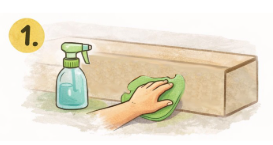
CleanMake sure the surface is clean, dry and free of dust.
2
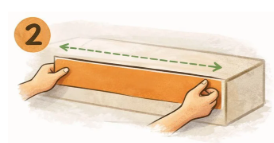
AlignHold the strip in front of the stair riser and centre it carefully before sticking it down.
3
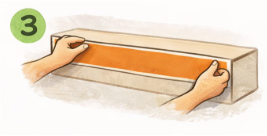
StickSecure one end of the sticker first, then gradually press it down towards the other side.
4
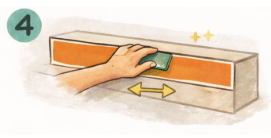
Press downRun your hand or a card across the entire surface to make sure it adheres firmly.
🪜
All done!
Enjoy your newly decorated staircase.
ℹ️ Important information
- Our panels include a protective transparent transfer film that makes installation easier and protects the design.
- Work in a clean, dry environment. Clean the wall before installation.
- Have these to hand: masking tape, a squeegee or soft cloth, a craft knife and a ruler.
- Use a squeegee or soft cloth to smooth out any air bubbles.
How to apply self-adhesive panels step by step
7 steps for a clean, bubble-free installation.
1
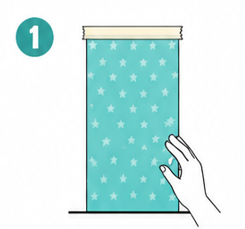
Position the first panelHold it against the wall and secure the top edge with masking tape, making sure it is perfectly straight both at the top and along the side.
2
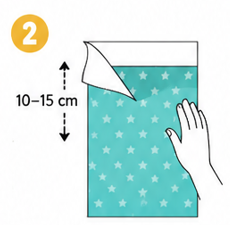
Start stickingPeel back 10–15 cm of the backing paper and press onto the wall, smoothing with a squeegee or soft cloth.
3
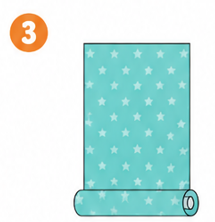
Roll up the rest of the panelThis will make the installation easier to manage.
4
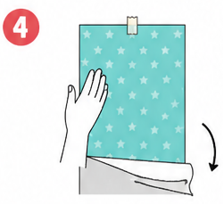
Stick graduallyContinue peeling back the backing paper a little at a time, smoothing from the centre outwards to avoid bubbles and creases.
5
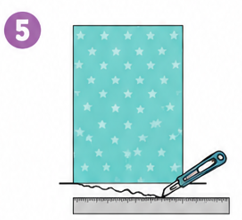
Trim the excessUse a craft knife and ruler to achieve a clean, precise cut.
6
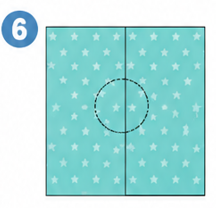
Apply the next panelOverlap by 3–4 mm to avoid any gaps.
7
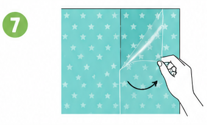
Remove the transparent transfer film
Once the panel is fully adhered, slowly peel away the transparent transfer film from one corner, pulling at a diagonal angle. Smooth it down again if needed.
🖼️
All done! Enjoy your decorated space.
📋 Before you start
- You will need: masking tape, a spirit level, a tape measure or ruler.
- Decide on the height before you begin and mark it at several points along the wall.
- Clean the wall thoroughly before applying the border trim.
Instructions for applying a border trim
4 steps for a perfectly straight, evenly aligned border.
1
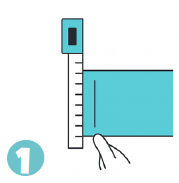
Set the heightDecide how high you want the border trim and measure up from the floor to that point.
2
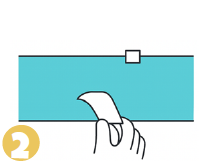
Apply the guide tapeStick masking tape just below that height, using a spirit level to check it is perfectly straight.
3
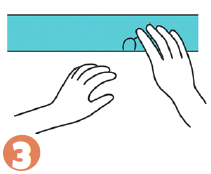
Apply the border trimAlign the bottom edge of the trim just above the tape. Press firmly as you apply it.
4
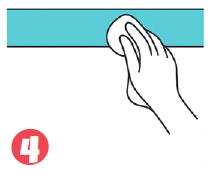
Remove the tapeCarefully peel away the masking tape once the trim is in place, taking care not to damage the design.
✨
All done!
Enjoy your space with the border trim perfectly in place.
📋 Before you start
- You only need water (no soap) and a squeegee.
- Clean the glass thoroughly before you begin to remove any dust and grease.
- If the piece is large, it is recommended to carry out the installation with two people.
How to apply window stickers
4 steps for a perfect installation on glass.
1
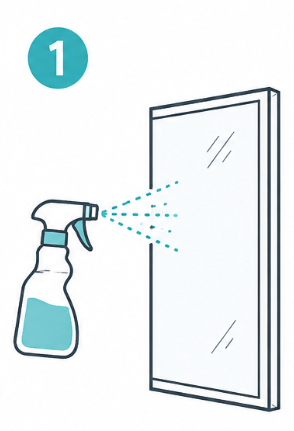
Clean the glassThoroughly clean the surface and mist it with water (plain water only, no soap).
2

Prepare the stickerPeel off the backing paper and mist the adhesive side with water too.
3
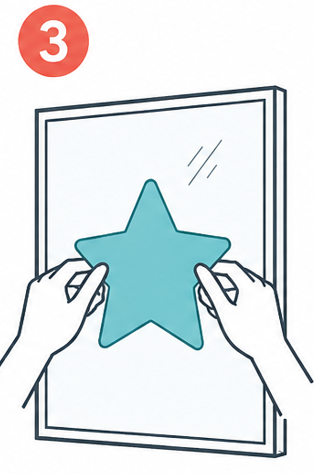
Position and adjustPlace the sticker on the glass and slide it into the desired position while it is still wet.
4
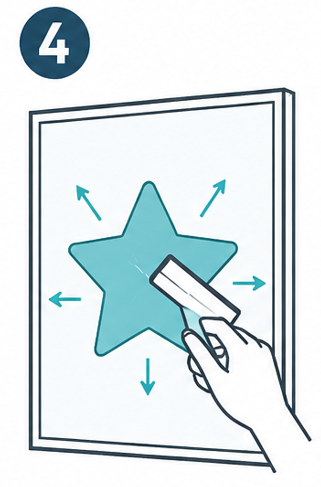
Squeegee and finishUse the squeegee to push out the water.
🪟
All done!
Enjoy your newly decorated window.